How to catalog a disk
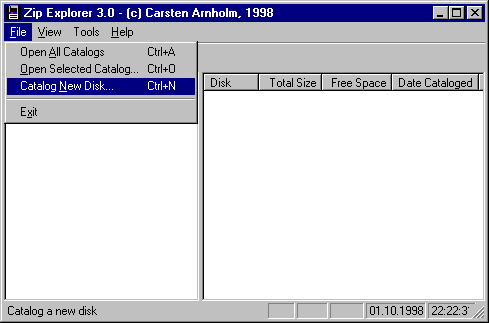
Select "Catalog New Disk" in the File menu to create a new catalog. You can also
use the Ctrl+N keyboard shortcut or the zip disk icon in the toolbar.

A small dialog
will appear, allowing you to select which disk to catalog. Press the black, inverted
triangle to see which disk (and their respective labels) that exist on your system.
Notice that Zip Explorer will choose the last removable disk (not counting CD-ROMs) as
the default to catalog.

If the disk you select has no label, you will be asked to enter the label after pressing "OK".
Zip Explorer will then label the disk, before cataloging it.
When you catalog a disk, the program will read through all the directories of the disk
and note the name, size and date for all files it encounters. If a zip file is found,
the program will also note information on files contained in the zip file (path
information will be used to present folders within the zip file).
The catalog information is written to a file in your catalog directory (look for a directory
named "Catalogs" under your Zip Explorer installation directory). The file will be
named after the disk label, and the type will be .zar.

